Butternut Squash Chips
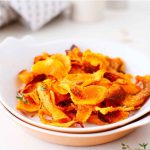
Super crispy and seasoned to perfection, these baked butternut squash chips are the perfect tasty, low-carb alternative to turn to when you're in the mood to snack. They're super easy to make, and a great way to use up any extra squash that you may have.
I love using these chips as a topping over my salads and soups when I run out of my Air Fryer tortilla strips.

Trust me when I say this- there's just something different about roasted veggies. Oven roasting even the simplest of veggies can really bring out and enhance their natural flavors.
I realized this when I made my oven dried tomatoes sometime back, and after that, I just try to get that beautiful golden brown caramelization whenever I can. This recipe beautifully captures that essence, and also makes the chips super crunchy.
Jump to:
What's So Great About the Recipe?
My favorite part about this recipe is the fact that these crisps are SO easy to make. You'll need to spend just a few minutes in the kitchen to make these, and you can also tweak and play around with the seasonings to transform their flavor.
And while you're at it, you can also whip up a quick batch of homemade breadcrumbs to store for later.
Recipe Ingredients

Butternut squash: Choose a ripe, firm and young butternut squash that doesn't have any soft spots.
Seasonings: I kept it simple and used some salt, pepper, garlic powder and paprika. You can also use a homemade seasoning like my lemon pepper seasoning if you want to.
Oil: Your regular cooking oil or olive oil. You can also use cooking spray if you want to.
Thyme: This one's optional, but I would recommend using it if you have it at hand. It lends a beautiful aroma to the chips.
See recipe card for quantities.
Substitutions & Variations
- Try using different seasonings to play around with the flavors. I love using my vegan Ranch seasoning mix when I want to keep it simple, and my homemade Creole seasoning when I'm craving for a bit of heat.
- You can also just keep it classic and use an infused salt like citrus salt, mixed herb salt, garlic parsley salt, jalapeno salt or celery salt to add flavor to the chips.
How to Make Butternut Squash Chips

Step 1: Slice a butternut squash into half. Core and peel it.

Step 2: Use a sharp knife to cut it into thin, uniform chips.

Step 3: Transfer to a bowl along with some oil and season with your choice of seasonings. Mix well to make sure everything is well coated.

Step 4: Transfer to a baking sheet lined with parchment paper and bake in a preheated oven at 375F for 20-25 minutes.
💭Top Tip
Make sure you dab away all the excess moisture after you slice the squash into chips. This will help them get super crispy.

How to Store Leftover Butternut Squash Chips
Got some extras? You can store them for up to a week in an airtight container at room temperature- just like my Parmesan croutons.
Tips & Tricks to Nail the Recipe
- Make sure you arrange the butternut squash chips in a single layer on your baking sheet. This will help them cook evenly.
- You can also flip them over midway during the cooking time to ensure they get that golden brown color on both sides.
- To get those even, thin slices, consider using a mandolin slicer.
- Love cheesy chips? Top them with some shredded Parmesan midway during the cooking time. I did the same when I made my crispy Italian breadcrumbs.
- You can also use an infused oil like garlic rosemary oil instead of the classic olive oil for extra flavor. I love using my habanero infused oil when I want the chips to have a bit of heat.
How to Use Butternut Squash Chips
Enjoy these butternut squash chips on their own as a snack or top them over your bowl of soup or salad for some extra crunchiness.
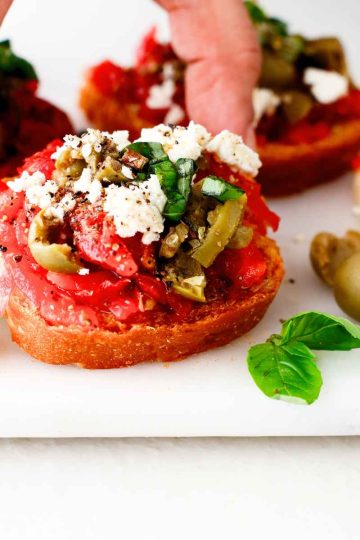
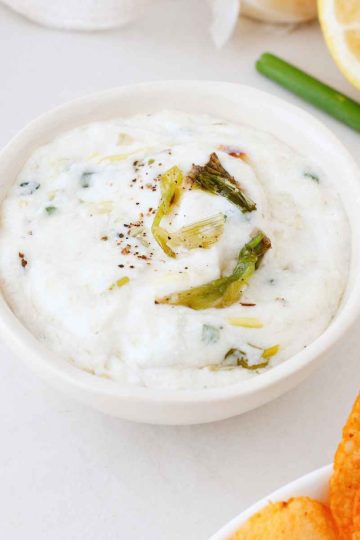
You can also pair them with a nice dip like garlic avocado dip or Air Fryer roasted salsa or even some Chinese hot mustard to make it a nice appetizer.

Recipe FAQs
Yes you can! Simply arrange them in a single layer in the Air Fryer basket and cook for 8-12 minutes or until golden brown and crispy.
You certainly can. However, if you're using a larger sized butternut squash, I would recommend peeling it, as the skin can be a bit tough.
More Side Recipes
Looking for other recipes like this? Try these:


If you tried this butternut squash chips recipe or any other recipe on my website, please leave a 🌟 star rating and let me know how it went in the 📝 comments below. Thanks for visiting!

Butternut Squash Chips
Ingredients
- 1 medium butternut squash
- ½ teaspoon garlic powder
- ½ teaspoon paprika
- ¼ teaspoon salt
- ¼ teaspoon black pepper
- 1 teaspoon oil
- 1 teaspoon thyme
Instructions
- Slice a butternut squash into half. Core and peel it.
- Use a sharp knife to cut it into thin, uniform chips.
- Transfer to a bowl along with some oil and season with your choice of seasonings. Mix well to make sure everything is well coated.
- Transfer to a baking sheet lined with parchment paper and bake in a preheated oven at 375F for 20-25 minutes.
Notes
- Make sure you arrange the butternut squash chips in a single layer on your baking sheet. This will help them cook evenly.
- You can also flip them over midway during the cooking time to ensure they get that golden brown color on both sides.
- To get those even, thin slices, consider using a mandolin slicer.
- Love cheesy chips? Top them with some shredded Parmesan midway during the cooking time. I did the same when I made my crispy Italian breadcrumbs.
- You can also use an infused oil like garlic rosemary oil instead of the classic olive oil for extra flavor. I love using my habanero infused oil when I want the chips to have a bit of heat.